
Pedro Camargo, Ph.D.
Tuesday, June 2, 2020
Spatialite and Python in 2020
Spatialite is one of those pieces of software that make you scratch your head when you realize it is the work of a single person and without huge support from major sponsors. The portability and power provided by that piece of software are just mind-boggling and seriously underappreciated.
Spatialite is also a cornerstone of AequilibraE’s infrastructure and the heart of its network editing features. However, getting it to work with Python is not easy, especially on Windows.
Because it has taken me so long to figure out how to work with Spatialite in Python and there very little I could find out there in terms of actual solutions and/or tutorials on the topic, I have decided to write this quick blog post to document the exact solution and have it for a future reference, as much for others as for me.
There are three different situations I address here:
- Working on Ubuntu Linux
- Working on Windows
- Setting up GitHub’s code test runners (GitHub Actions).
Ubuntu Linux setup
Setting Spatialite in Linux is rather simple if you do not require the functionality provided by LWGEOM, as that is not included in the libspatialite binaries available to install directly in Ubuntu.
sudo apt-get install libsqlite3-mod-spatialite
sudo apt-get install -y libspatialite-dev
sudo ln -s /usr/lib/x86_64-linux-gnu/mod_spatialite.so /usr/lib/x86_64-linux-gnu/mod_spatialite
pip3 install spatialite pysqlite3-binary
After installing the libraries above, a few details need to be observed in your Python code in order to make full use of Spatialite
import pysqlite3 as sqlite3

conn = sqlite3.connect('path/to/file')
conn.enable_load_extension(True)
conn.load_extension("mod_spatialite")
If you already use SQLite in Python, it is likely that you are wondering why I imported pysqlite3 (the pysqlite3-binary package) and not sqlite3 directly. That is necessary because the sqlite3.dll shipped with Python does not include the RTree extension for Spatialite, and that extension is necessary for spatial indices to work.
Windows Setup
Setting up Spatialite on Windows is a bit more convoluted than it is on Linux, but it comes with access to the latest version of Spatialite (not yet officially released) and all of its features.
Just like it happened in the Linux case, we need to get Spatialite installed and to replace the SQLite3 version we are using from Python, but the way of getting it done changes substantially.
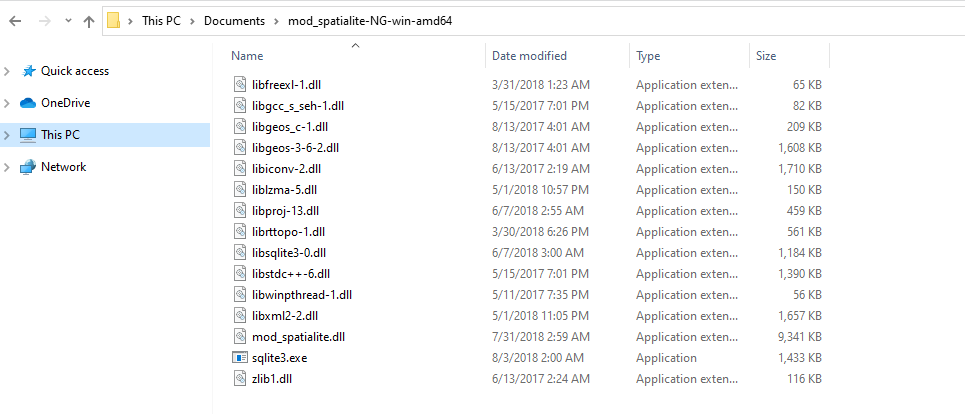
First of all, you should download the compiled binary filed from the project’s home-page and unpack it in your system (I always use the NEW-GENERATION binaries). On mine, it looks like this:
Now, there are two possibilities for loading Spatialite wiht your Python code:
- Dynamically add your Spatialite address FOLDER to your environment
import sqlite3
import os

spatialite_path = 'c:/path/to/spatialite/folder'
# e.g. spatialite_path  = 'C:/Users/pedro/Documents/mod_spatialite-NG-win-amd64
os.environ['PATH'] = spatialite_path + ';' + os.environ['PATH']

conn = sqlite3.connect('path/to/file')
conn.enable_load_extension(True)
conn.load_extension("mod_spatialite")
- Add the path to the Spatialite folder to the system’s path and assume that the system will know Spatialite from that time forth
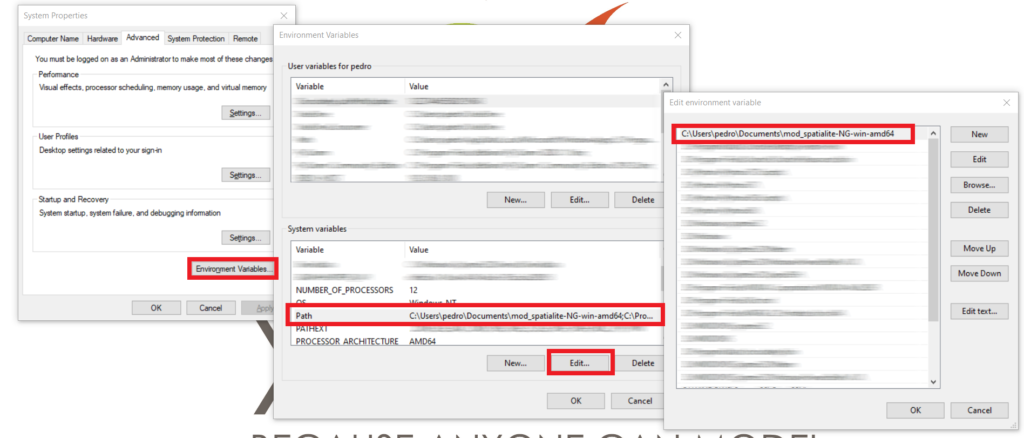
The Python code is, obviously, a little simpler in this case.
import sqlite3
conn = sqlite3.connect('path/to/file')
conn.enable_load_extension(True)
conn.load_extension("mod_spatialite")
Stopping here allows you quite a bit of latitude with Spatialite, but all operations that rely on spatial indices will still be out of reach, as the Sqlite3.dll shipped with Python does does include RTree. Fixing this issue, however, is not difficult. This is just a matter of replacing the sqlite3.dll in your main Python installation (virtual environments do not have their own).
While you can compile your own SQLite3.dll, it is also possible to just download a fully-featured DLL from the SQLite website. At the time of writing of this post, the latest versions available were for SQLite version 3.32.1, available for x86 and x64 (available under Precompiled Binaries for Windows).
After downloading the appropriate file, you can simply replace the DLL in your system (might be located at a place such as C:\Python37\DLLs). Replacing this DLL does not impact your Python code.
Do this at your own risk, and remember to back it up the original DLL first.
Github Actions configuration
If you are trying to run automated tests on your code using GitHub Actions (what a brilliant resource, BTW), you will have to replace the SQLite3.dll before running your tests, which can be done on its own workflow phase, but you need to figure out where is the Python installation you are using coming from.
As far as I have been able to determine, all Python installations are located under ‘C:/hostedtoolcache/windows/Python’, and at the time of writing, the exact locations are the following.
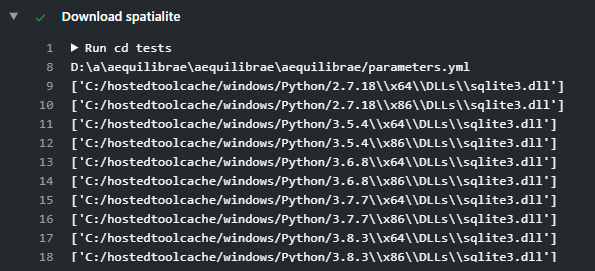
Implementing this solution is rather easy, as I unpack Spatialite to the root drive and replace the SQLite3.dll in all Python versions available (I have never tested it with Python 2.7).
import urllib.request
import zipfile
from os.path import join
from os import walk

pth = 'https://github.com/AequilibraE/aequilibrae/releases/download/V0.6.0.post1/mod_spatialite-NG-win-amd64.zip'
outfolder = 'C:/'
dest_path = join(outfolder, "mod_spatialite-NG-win-amd64.zip")
urllib.request.urlretrieve(pth, dest_path)
zipfile.ZipFile(dest_path).extractall(outfolder)

# We now set sqlite. Only needed in thge windows server in Github
pth = 'https://sqlite.org/2020/sqlite-dll-win64-x64-3320100.zip'
outfolder = 'C:/'
zip_path64 = join(outfolder, "sqlite-dll-win64-x64-3320100.zip")
urllib.request.urlretrieve(pth, zip_path64)

root = 'C:/hostedtoolcache/windows/Python/'
file = 'sqlite3.dll'
for d, subD, f in walk(root):
    if file in f:
        if 'x64' in d:
            zipfile.ZipFile(zip_path64).extractall(d)
With this setup done, it is just a matter of adding the root C:\ drive to the environment variables in the setup phase of all tests requiring Spatialite, and you are golden.
The GitHub workflow that leverages this setup looks something like this:
name: Tests on Windows

on: [pull_request]

jobs:
  testing:
    runs-on: windows-latest
    strategy:
      matrix:
        python-version: [ '3.6', '3.7', '3.8']
    steps:
    - uses: actions/checkout@v2
    - name: Set Python environment
      uses: actions/setup-python@v1
      with:
        python-version: ${{ matrix.python-version }}
        architecture: x64

    - name: Install dependencies
      run: |
        python -m pip install --upgrade pip
        pip install -p
        pip install pytest shapely

    - name: Sets up Sqlite and Spatialite
      run: |
        cd tests
        python setup_windows_spatialite.py
        cd ..

    - name: Runs test
      run: |
        python -m pytest
In case you are running tests on Linux, there is no fidgeting needed, but you will be constrained by the limitations mentioned above.
Conclusion
This is embarrassingly hacky, but it works. And I have also not found any other alternative so far.
Do you know of a better way? Let me know!!